
Spring IOC 与 AOP
IOC
IOC: Inverse Of Control : 控制反转,将对象创建的权力交给容器。
反射
Class clazz = Class.forname("完全限定名");
Class clazz = 对象.getClass();
Class clazz = 类.class;

Constructor  cotr = claszz.getConstruction();
Object instance = cotr.newInstance();
Bean作用域
Bean的作用域是指我们获取某个bean时,此bean是全局的(单例的),还是局部的(多实例)。通过scope属性来配置。
- singleton : 单实例,加载spring配置文件的时候会创建单实例对象
- prototype : 多实例,不会在加载 spring 配置文件的时候创建对象,在调用 getBean() 方法的时候创建多实例对象。
- request : 每次请求都会创建bean
- session : 和session绑定。
    <bean id="dept1" class="autowire.Dept" scope="prototype"/>
    <bean id="emp" class="autowire.Emp" scope="prototype">
        <property name="dept1" ref="dept1"/>
    </bean>
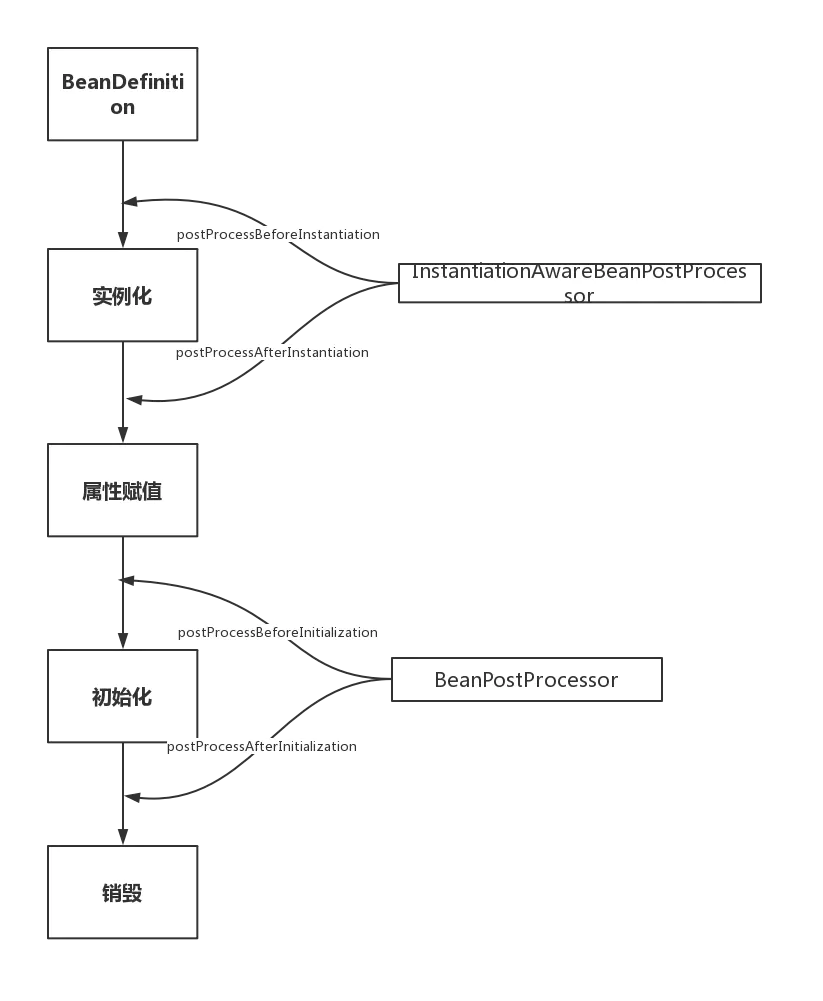
Bean生命周期
- 通过构造器创建bean实例(实例化)
- 为bean的属性设置值和其他bean的引用 (属性填充)
- 初始化之前,把bean的实例传递给后置处理器
- 调用bean的初始化的方法 (初始化)
- 初始化之后,把bean的实例传递给后置处理器
- bean获取到了
- 容器关闭的时候,bean销毁 (destoryMethod)
    <bean id="orders" class="bean.Orders" init-method="initMethod" destroy-method="destroyMethod" >
        <property name="name" value="手机"/>
    </bean>

    <!--配置后置处理器-->
    <bean id="myBeanPost" class="bean.MyPostProcessor"/>
生命周期示例
1.定义一个主体类orders
package bean;

import org.springframework.context.annotation.ImportResource;
import org.springframework.stereotype.Repository;

/**
 * @Describe: 类描述
 * @Author: tyf
 * @CreateTime: 2022/3/21
 **/
@Repository
//@ImportResource(locations = "/bean4.xml")
public class Orders {

    String name = null;


    public Orders(){
        System.out.println("第一步,创建对象");
    }

    public void setName(String name) {
        this.name = name;
        System.out.println("第二步,属性注入,调用set方法设置属性值");
    }

     //这里实现其初始化方法
    public void initMethod(){
        System.out.println("第三步,执行初始化的方法");
    }

     //这里定义其销毁方法
    public void destroyMethod(){
        System.out.println("第五步,执行了销毁方法");
    }
}
2. 定义后置处理器BeanPostProcessor
扩展点之一,
package bean;

import org.springframework.beans.BeansException;
import org.springframework.beans.factory.config.BeanPostProcessor;
import org.springframework.stereotype.Component;

/**
 * @Describe: 类描述
 * @Author: tyf
 * @CreateTime: 2022/3/21
 **/
@Component
public class MyPostProcessor implements BeanPostProcessor {
    @Override
    public Object postProcessBeforeInitialization(Object bean, String beanName) throws BeansException {
        System.out.println("初始化之前的后置处理器处理");
        return BeanPostProcessor.super.postProcessBeforeInitialization(bean, beanName);
    }

    @Override
    public Object postProcessAfterInitialization(Object bean, String beanName) throws BeansException {
        System.out.println("初始化之后的后置处理器处理");
        return BeanPostProcessor.super.postProcessAfterInitialization(bean, beanName);
    }
}
3.配置BeanFactoryPostProcesser
是扩展点之一,Spring IoC容器允许BeanFactoryPostProcessor在容器实际实例化任何其它的bean之前读取配置元数据。也就是允许其对 Bean Definition 的修改
package bean;

import org.springframework.beans.BeansException;
import org.springframework.beans.factory.config.BeanFactoryPostProcessor;
import org.springframework.beans.factory.config.ConfigurableListableBeanFactory;
import org.springframework.stereotype.Component;

/**
 * @Describe: 用来在实例化之前执行,对Bean Definition信息的修改
 * @Author: tyf
 * @CreateTime: 2022/3/22
 **/
@Component
public class MyBeanFactoryPostProcessor implements BeanFactoryPostProcessor {
    @Override
    public void postProcessBeanFactory(ConfigurableListableBeanFactory beanFactory) throws BeansException {
        System.out.println("初始化工厂.....");
        System.out.println("将要创建的bean对象名字是"+ beanFactory.getBeanDefinition("orders").getBeanClassName());
        System.out.println("将要创建的bean对象原来作用域是"+ beanFactory.getBeanDefinition("orders").getScope());
        beanFactory.getBeanDefinition("orders").setScope("singleton");
        System.out.println("将要创建的bean对象修改后作用域是"+ beanFactory.getBeanDefinition("orders").getScope());
    }
}
4.编写xml文件
<?xml version="1.0" encoding="UTF-8"?>
<beans xmlns="http://www.springframework.org/schema/beans"
       xmlns:xsi="http://www.w3.org/2001/XMLSchema-instance"
       xsi:schemaLocation="http://www.springframework.org/schema/beans http://www.springframework.org/schema/beans/spring-beans.xsd">

     //声明bean对象
    <bean id="orders" class="bean.Orders" init-method="initMethod" destroy-method="destroyMethod" scope="prototype">
        <property name="name" value="手机"/>
    </bean>

    <!--配置后置处理器和bean工厂处理器-->
    <bean id="myBeanPost" class="bean.MyPostProcessor"/>
    <bean id="myBeanFactoryPostProcessor" class="bean.MyBeanFactoryPostProcessor"/>
</beans>
4.编写测试
@Test
public void test3(){
     //        AnnotationConfigApplicationContext context = new AnnotationConfigApplicationContext(MyConfig.class);
     ClassPathXmlApplicationContext context = new ClassPathXmlApplicationContext("bean4.xml");
     Orders orders = context.getBean("orders", Orders.class);

     System.out.println("第四步,可以使用了");
     context.close();
}
5. 结果
09:40:43.625 [main] DEBUG org.springframework.context.support.ClassPathXmlApplicationContext - Refreshing org.springframework.context.support.ClassPathXmlApplicationContext@27f674d
09:40:43.826 [main] DEBUG org.springframework.beans.factory.xml.XmlBeanDefinitionReader - Loaded 3 bean definitions from class path resource [bean4.xml]
09:40:43.860 [main] DEBUG org.springframework.beans.factory.support.DefaultListableBeanFactory - Creating shared instance of singleton bean 'myBeanFactoryPostProcessor'
初始化工厂.....
将要创建的bean对象名字是bean.Orders
将要创建的bean对象原来作用域是prototype
将要创建的bean对象修改后作用域是singleton
09:40:43.876 [main] DEBUG org.springframework.beans.factory.support.DefaultListableBeanFactory - Creating shared instance of singleton bean 'myBeanPost'
09:40:43.881 [main] DEBUG org.springframework.beans.factory.support.DefaultListableBeanFactory - Creating shared instance of singleton bean 'orders'
第一步,创建对象
第二步,属性注入,调用set方法设置属性值
初始化之前的后置处理器处理
第三步,执行初始化的方法
初始化之后的后置处理器处理
第四步,可以使用了
09:40:43.955 [main] DEBUG org.springframework.context.support.ClassPathXmlApplicationContext - Closing org.springframework.context.support.ClassPathXmlApplicationContext@27f674d, started on Sun Apr 10 09:40:43 CST 2022
第五步,执行了销毁方法

进程已结束,退出代码0
相关资料
-
SpringBoot中的循环依赖问题:
- https://juejin.cn/post/6882266649509298189
- https://tans.fun/archives/spring-xun-huan-yi-lai-wen-ti-pou-xi
AOP
0.相关术语
- 连接点:类的哪些方法可以被增强
- 切入点:实际上被真正增强的方法,称作切入点
- 通知:实际增强的逻辑部分称为通知(增强)
- 前置通知(Before) : 方法执行之前执行
- 后置通知 (After): 方法执行之后执行
- 环绕通知 (Around):在方法执行前后执行
- 异常通知 (After Throwing) :有异常的时候执行
- 最终通知(After Returning) :有异常的时候不执行,当返回值后执行
- 切面:是动作,把我们通知应用到切入点的过程就是切面。
- AspectJ:不是Spring组成部分,一般将Aspect和Spring一起使用,进行Aop操作。
- 切入点表达式:
execution[权限修饰符号][返回类型][方法名称][参数列表]
1.步骤
-
创建类
@Component public class User { public void add(){ System.out.println("add.........."); } } -
创建增强类
@Component @Aspect public class UserProxy { } -
spring配置文件中配置bean对象以及开启生成代理对象
<?xml version="1.0" encoding="UTF-8"?> <beans xmlns="http://www.springframework.org/schema/beans" xmlns:xsi="http://www.w3.org/2001/XMLSchema-instance" xmlns:context="http://www.springframework.org/schema/context" xmlns:aop="http://www.springframework.org/schema/aop" xsi:schemaLocation="http://www.springframework.org/schema/beans http://www.springframework.org/schema/beans/spring-beans-3.1.xsd http://www.springframework.org/schema/context http://www.springframework.org/schema/context/spring-context-3.1.xsd http://www.springframework.org/schema/aop https://www.springframework.org/schema/aop/spring-aop.xsd"> <!--开启注解的扫描--> <context:component-scan base-package="aop"/> <!--开启Aspect生成代理对象--> <aop:aspectj-autoproxy/> </beans> -
在增强方法中配置不同类型的通知
@Component @Aspect public class UserProxy { //前置通知 //@Before代表是前置通知 @Before(value = "execution(* aop.User.add(..))") public void before(){ System.out.println("before........."); } //后置通知 //@After代表是后置通知 @After(value = "execution(* aop.User.add(..))") public void after(){ System.out.println("after........."); } //异常 //AfterThrowing代表是异常通知 @AfterThrowing(value = "execution(* aop.User.add(..))") public void afterThrowing(){ System.out.println("after Throwing........."); } //异常 //@AfterReturning代表是异常通知 @AfterReturning(value = "execution(* aop.User.add(..))") public void afterReturning(){ System.out.println("after Returning........."); } //环绕通知 //@Around代表是后置通知 @Around(value = "execution(* aop.User.add(..))") public void around(ProceedingJoinPoint proceedingJoinPoint) throws Throwable { System.out.println("环绕之前........."); proceedingJoinPoint.proceed(); System.out.println("环绕之后........."); } } -
公共点的抽取
public class UserProxy { //公共点 @Pointcut(value = "execution(* aop.User.add(..))") public void pointCutDemo(){ } //前置通知 //@Before代表是前置通知 @Before(value = "pointCutDemo()") //使用我们的切入点 public void before(){ System.out.println("Person before........."); } } -
当多个类对同一方法增强的时候,会增强类的优先级
//----------------------------------------------
@Aspect
@Order(3) // 设置优先级,值越低那么优先级越高
@Component
public class PersonProxy {

        //公共点
        @Pointcut(value = "execution(* aop.User.add(..))")
        public void pointCutDemo(){
        }

        //前置通知
        //@Before代表是前置通知
        @Before(value = "pointCutDemo()")
        public void before(){
            System.out.println("User before.........");
        }
}

//----------------------------------------------
@Aspect
@Order(1)
@Component
public class PersonProxy {

        //公共点
        @Pointcut(value = "execution(* aop.User.add(..))")
        public void pointCutDemo(){
        }

        //前置通知
        //@Before代表是前置通知
        @Before(value = "pointCutDemo()")
        public void before(){
            System.out.println("Person before.........");
        }
}


//-------------------------------------------------
Person before............
User before..............
add.................
设计模式
单例模式
默认创建的bean是单例的
//附上一个DLL双重校验锁的单例模式
class Singleton{
     private static Singleton instance;
     private Singleton(){}
     public static getInstance(){
          if(instance == null){
               sychronized(Singleton.class){
                    if(instance == null){
                         intance = new Singleton();
                    }
               }
          }
          return instance;
     }
}
观察者模式
是对象行为型模式,当一个对象行为状态改变的时候,与之相关联的对象会接收通知并发生相应的变换;
工厂模式
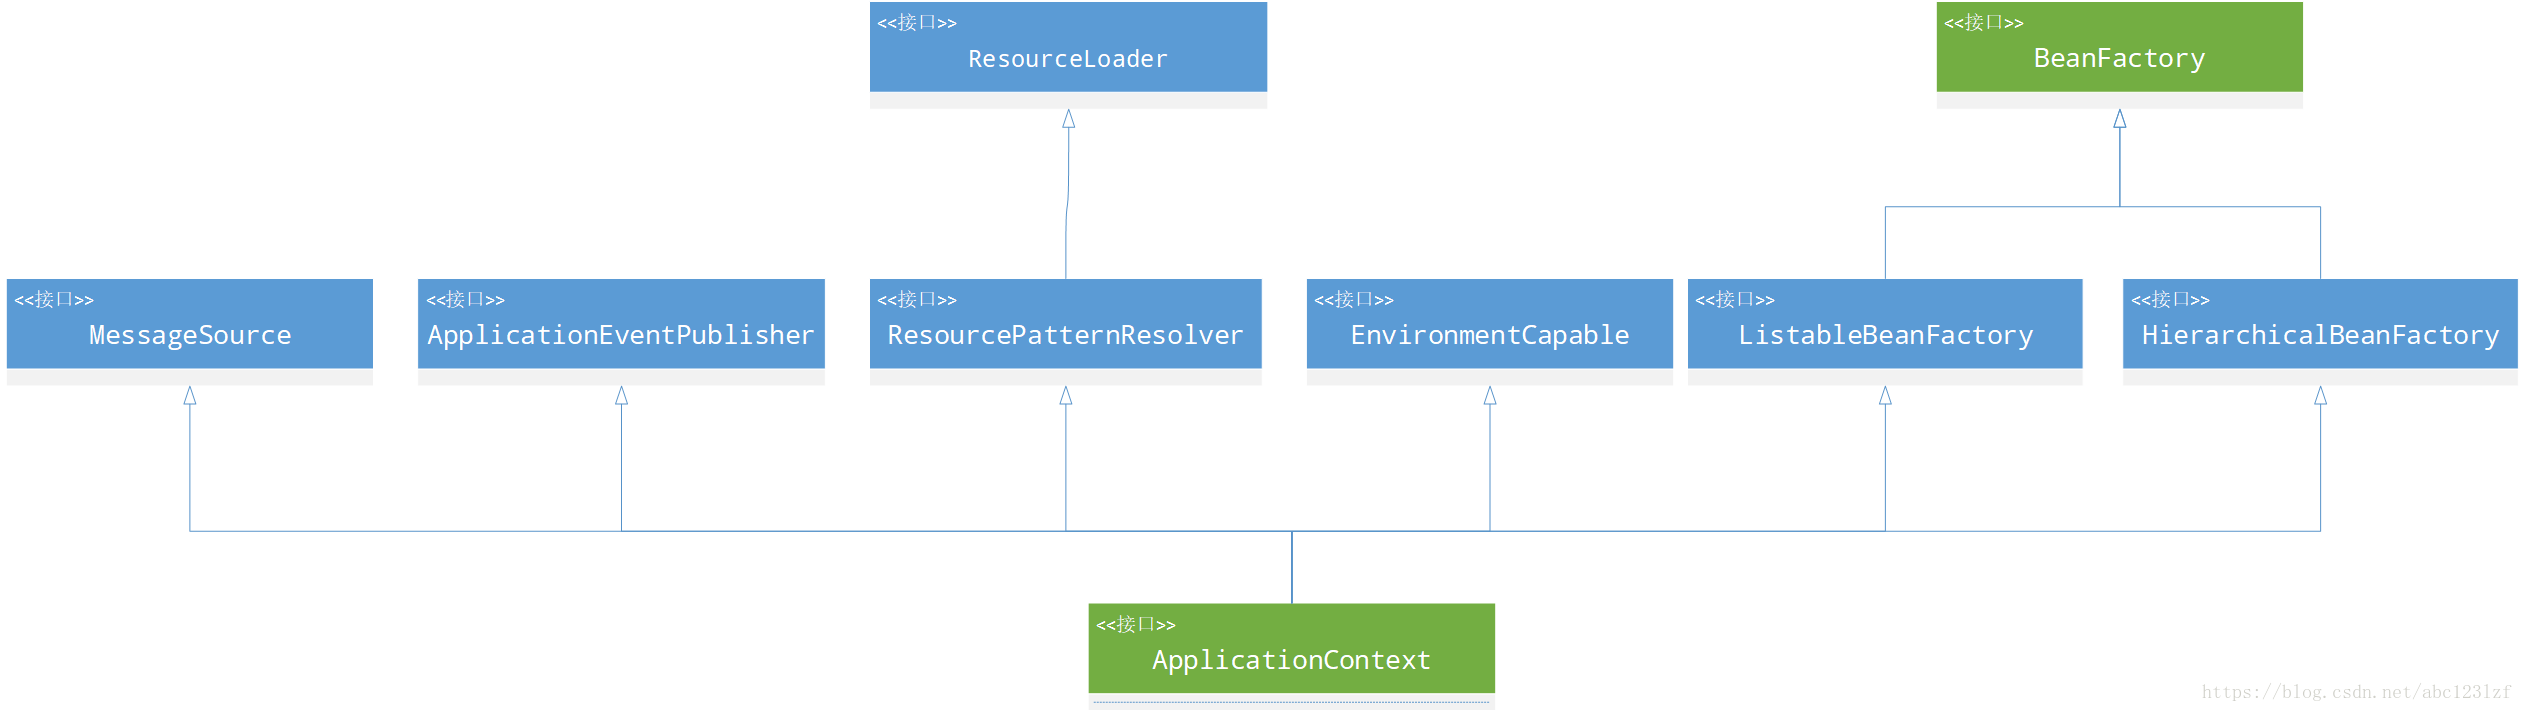
通过Bean Factory和Application Context来创建bean对象。后者是前者的一个实现。
区别:
- Bean Factory对bean的创建是延迟加载,当真正使用的时候才会实例化并属性注入等,也是说当只有第一次使用
getBean()方法的时候,才会进行对象的生成。 Application Context继承了ResourceLoader,提供了同一的资源管理方式。- 继承
MessageSource,支持国际化。
代理设计模式
其通过aop来进行实现类以及方法等的代理。
模板方法模式
这里模板方法将多个子任务分解成相应的子任务,然后子任务分为两种:
- 自己已经实现的
- 抽象方法,必须要实现类进行全部实现
那么实现类在对各个子任务做具体实现后,直接调用模板方法即可。Spring 中 jdbcTemplate、hibernateTemplate```transactionTemplate 等以 Template 结尾的对数据库操作的类,它们就使用到了模板模式。
其他参考资料
- Spring事务:Spring事务剖析


